
Precision Camera Calibration
In the automatic orientation of ELCOVISION 10, cameras are automatically calibrated if necessary. However, the measurement accuracy is considerably lower than if the cameras are precision calibrated on a good test field.
With the fully automatic camera calibration it is very easy to calibrate cameras with ELCOVISION 10. However, the most important thing is to set up a good test field. Without a good test field, a camera calibration is doomed to failure from the outset.
Design of the Test Field
The test field should be as large as possible. The standard calibration field of the PMS AG measures e.g. 20 x 14 x 3m. There should also be enough space in front of the test field so that one can move freely in front of it. For small focal lengths one must have approx. 10 to 15 m space in front of this field, for long focal lengths up to 50 m or more free view is required.
For fast, less accurate calibrations, we have also installed a small test field with a size of approx. 4 x 2 x 0.5m in our office.
Prerequisites for the test field wall
The wall should be made of concrete, brick or other building material that is very stable in itself. Wood, gypsum plasterboard (Rigips) walls are not suitable, as their mechanical stability is not given particularly with temperature changes. This is especially true for metal facades. A wall is particularly suitable if it is not totally flat, but goes over "corners" or has projections and niches. This ensures a welcome depth gradation of the points.
Assembly of the test field
Download the ELCOVISION 10 Targets and use adhesive labels or other suitable substrates depending on the desired life of the calibration wall. Stick or attach the targets to the wall as in this example:
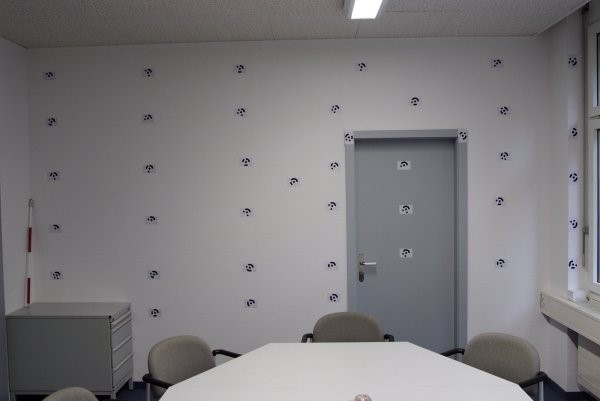
The target marks on the window parapet and on the door leaf and door post ensure a little depth expansion of the test field.
Survey the test field with a precision tachymeter or another calibrated camera. Create an ELCOVISION 10 coordinate file:
Point Number Code X coordinate Y coordinate Z coordinate
e.g. like this:
10 123 10.501 10.6421 10.8424 11 123 9.534 11.6314 12.3335
Important is the code 123 as control point code for ELCOVISION 10. Points which are on movable elements, e.g. on top of the door panel, are not included as control points in the coordinate file, but only as normal points with the code 0.
Photographing the Calibration Test Field
- If possible, place yourself on one side of the test field, e.g. as far to the right as possible, in order to fill the image with the test field.
- Take a picture.
- Turn the camera 90° clockwise.
- Take one step to the left.
- You may want to go back or forward a bit to get the test field back onto the image in full format.
- Take a picture.
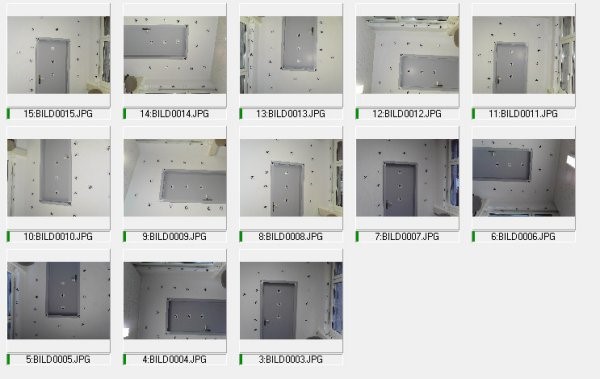
- Repeat steps 3 to 6 until you have taken at least 12 pictures from different positions and have turned the camera at least 3 times completely 360°.
The result of the shots could then look like this:
Calibrating the camera with ELCOVISION 10
Start ELCOVISION 10.
Drag the images you have taken into the ELCOVISION 10 program window:
Start the automatic orientation and calibration with targets:
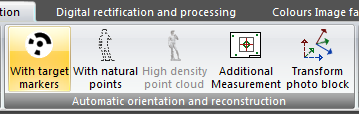
The automatic Orientation and Camera Calibration Wizard starts:
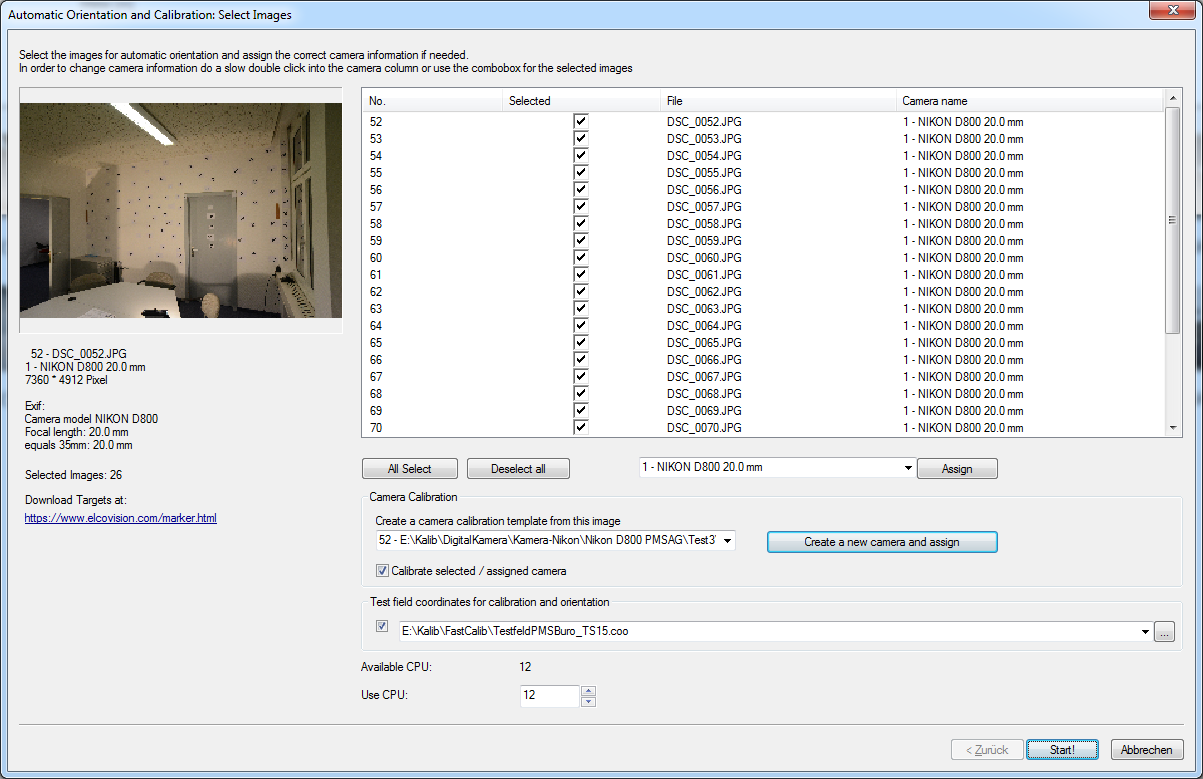
Press Create and assign new camera to create a new camera in the ELCOVISION 10 camera file.
In Test field coordinates for calibration and orientation, select the previously generated coordinate file as the test field coordinates.
Press Start! to start calibration.
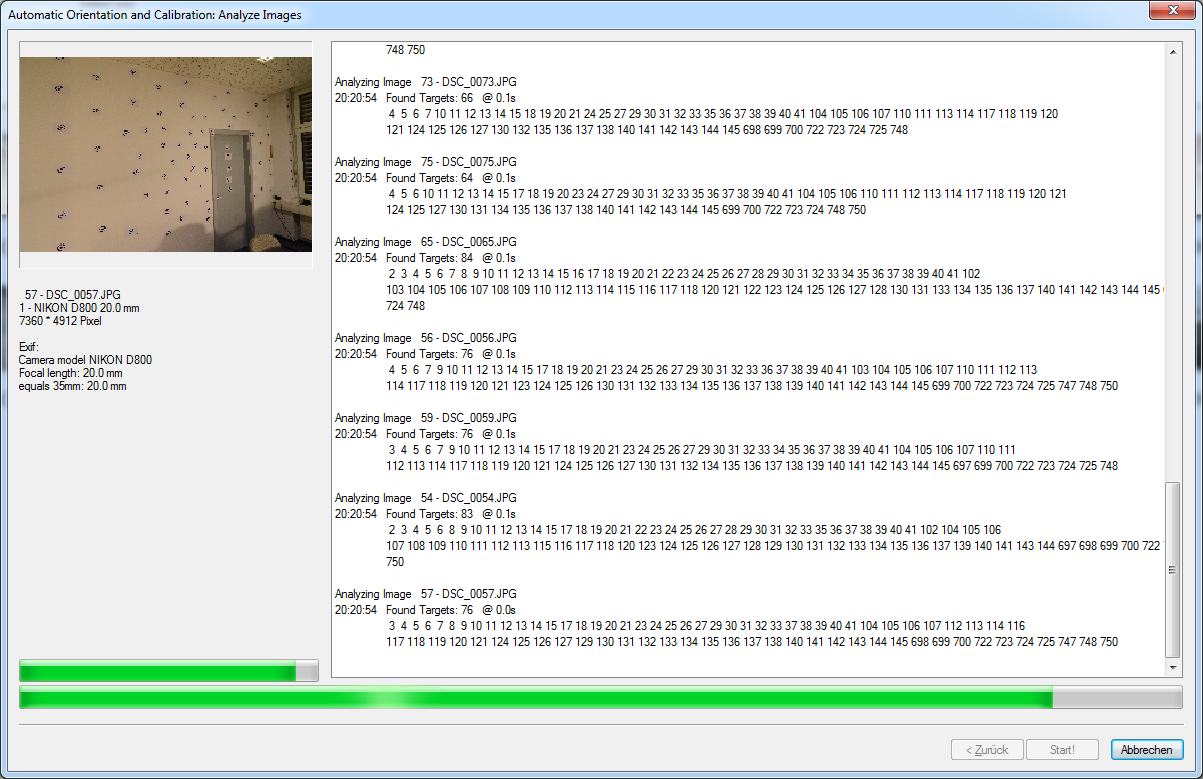
ELCOVISION 10 now examines the images for targets and displays these intermediate results, which are also cached in "ImageName.atimo":
Then the automatic orientation starts with calibration and after some time such a result appears:
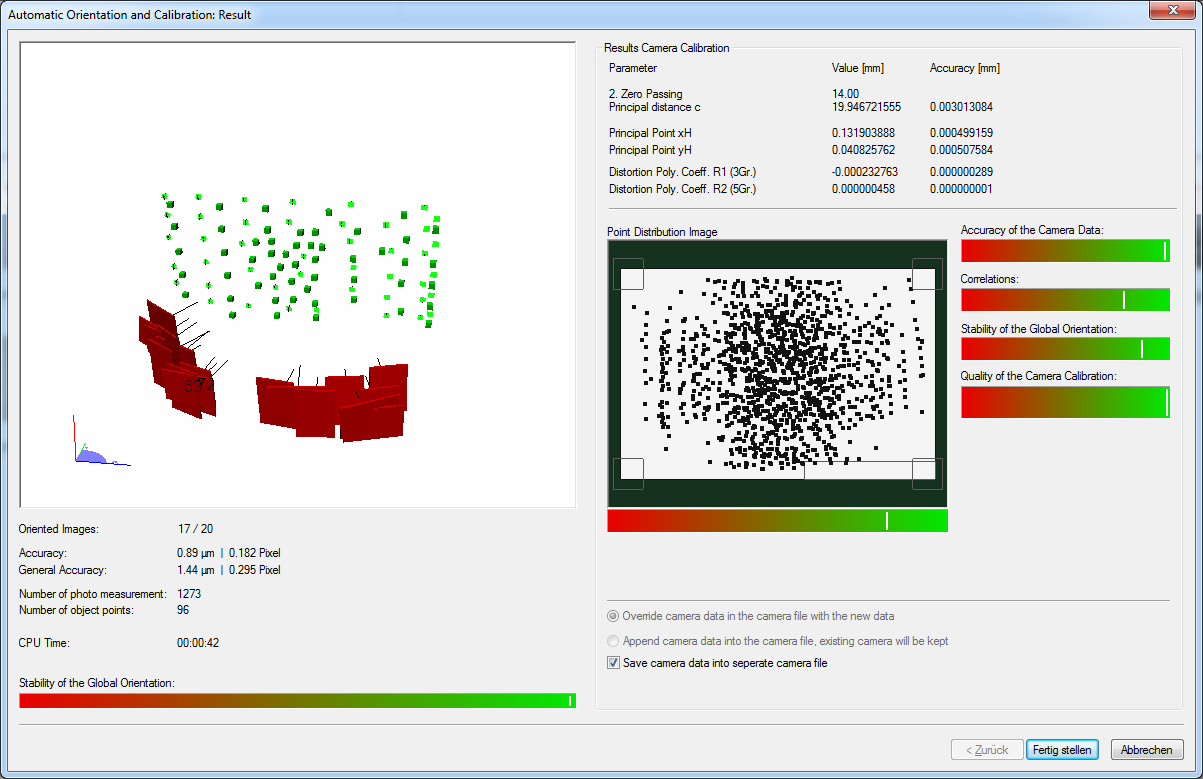
Important is a good point distribution in "Point Distribution Image". All values should also be in the "green area".
After Finish, the new camera data is automatically transferred to the camera file and also saved in a separate file in the project directory.