
Compute a High Density Pointcloud
Overview
For the calculation of the high density point cloud, the computer must have an NVIDIA graphics card with at least 4GB RAM, and an up-to-date driver must be installed that supports at least CUDA 9.1. better 10.0 or newer. The calculation itself is an enormously computationally and memory intensive process, which can take several hours on bigger projects.
For the calculation the images are scaled down to a user defined size and then a 3D point is created for each pixel of these images if possible. The smaller this image size is, the faster the calculation is, but the coarser the result will be. For example, details are hardly visible when using image sizes of < 800 pixels. However, such resolutions are quite sufficient to calculate very good terrain models in a short time
You can speed up the calculation a little bit even with large images, if you set an upper limit to the software for the image examinations. This limit should not be too small to avoid holes in the reconstruction. ELCOVISION 10 wants to examine at least 10 neighboring images. More than 25 neighbouring images will lead to longer processing times but will not lead to any improvement.
If the calculation fails with the error "memory full" you can repeat the calculation by scaling down the number of neighbouring images or by scaling down the images. Or you can get a graphics card with more memory.
Start of the calculation
A new high density point cloud can be added at any time. The start is done with "High Density Point Cloud" in the ribbon bar:

The first page of the High Density Point Cloud Wizard appears:
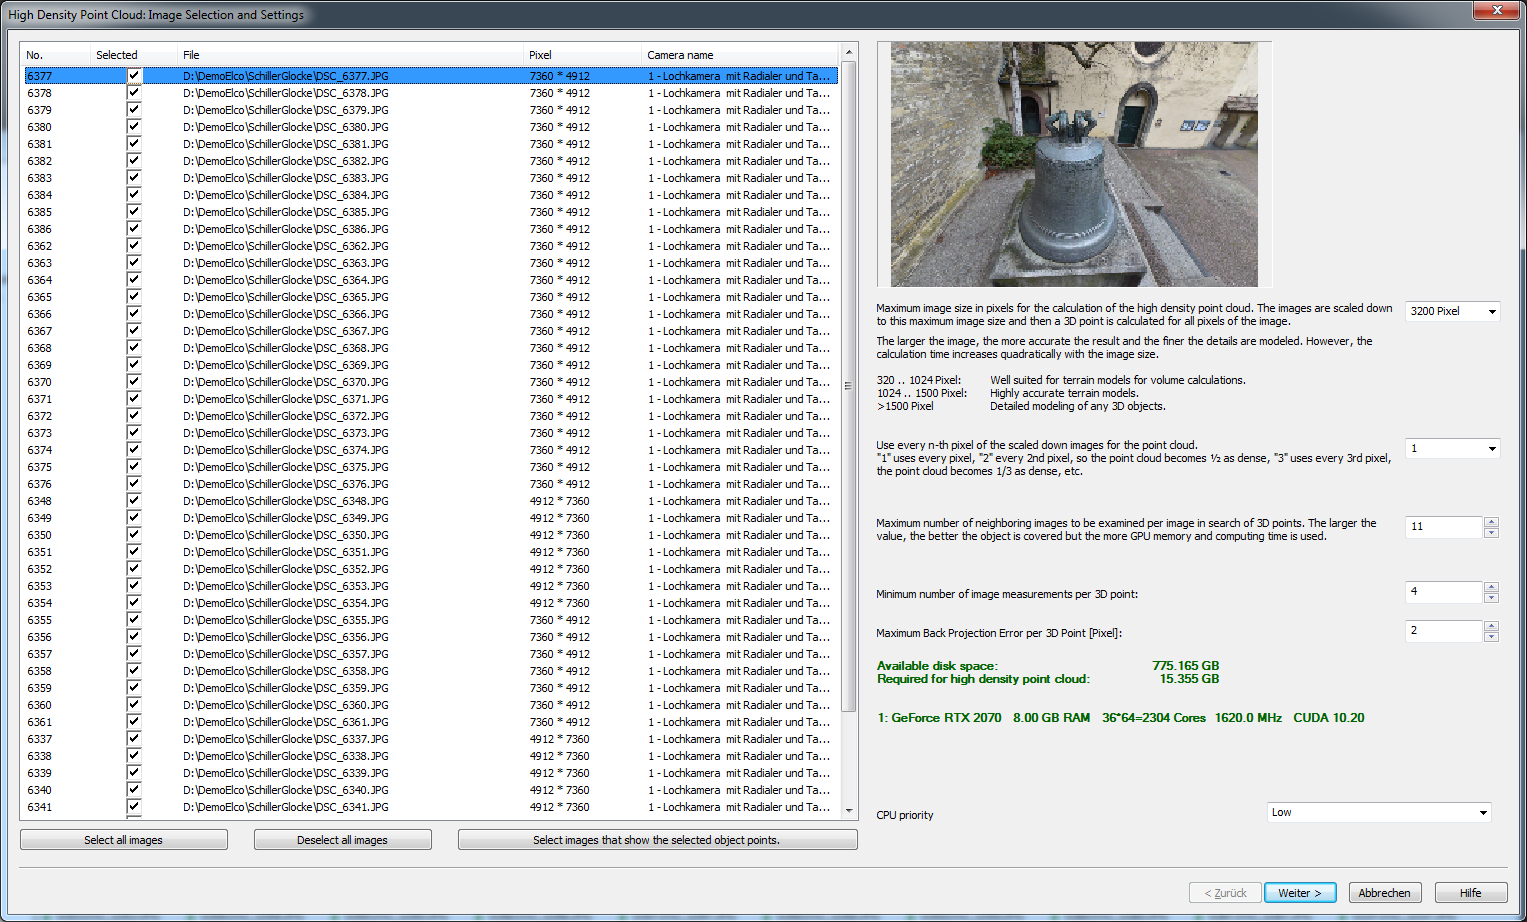
Minimum number of image measurements per 3D point
Here the value should not fall below 3 so that the point cloud does not become too bad. However, more than 6..8 does not bring any more improvement.
Maximum rear projection error per 3D point in pixels
Each 3D point of the point cloud is the result of a multi-image measurement and is therefore subject to errors. Here you can set the maximum distance that must be kept when the 3D point is projected back into the image: Distance projected point - point that was measured.
The set value of 2 pixels is a good compromise between accuracy and density of the point cloud.
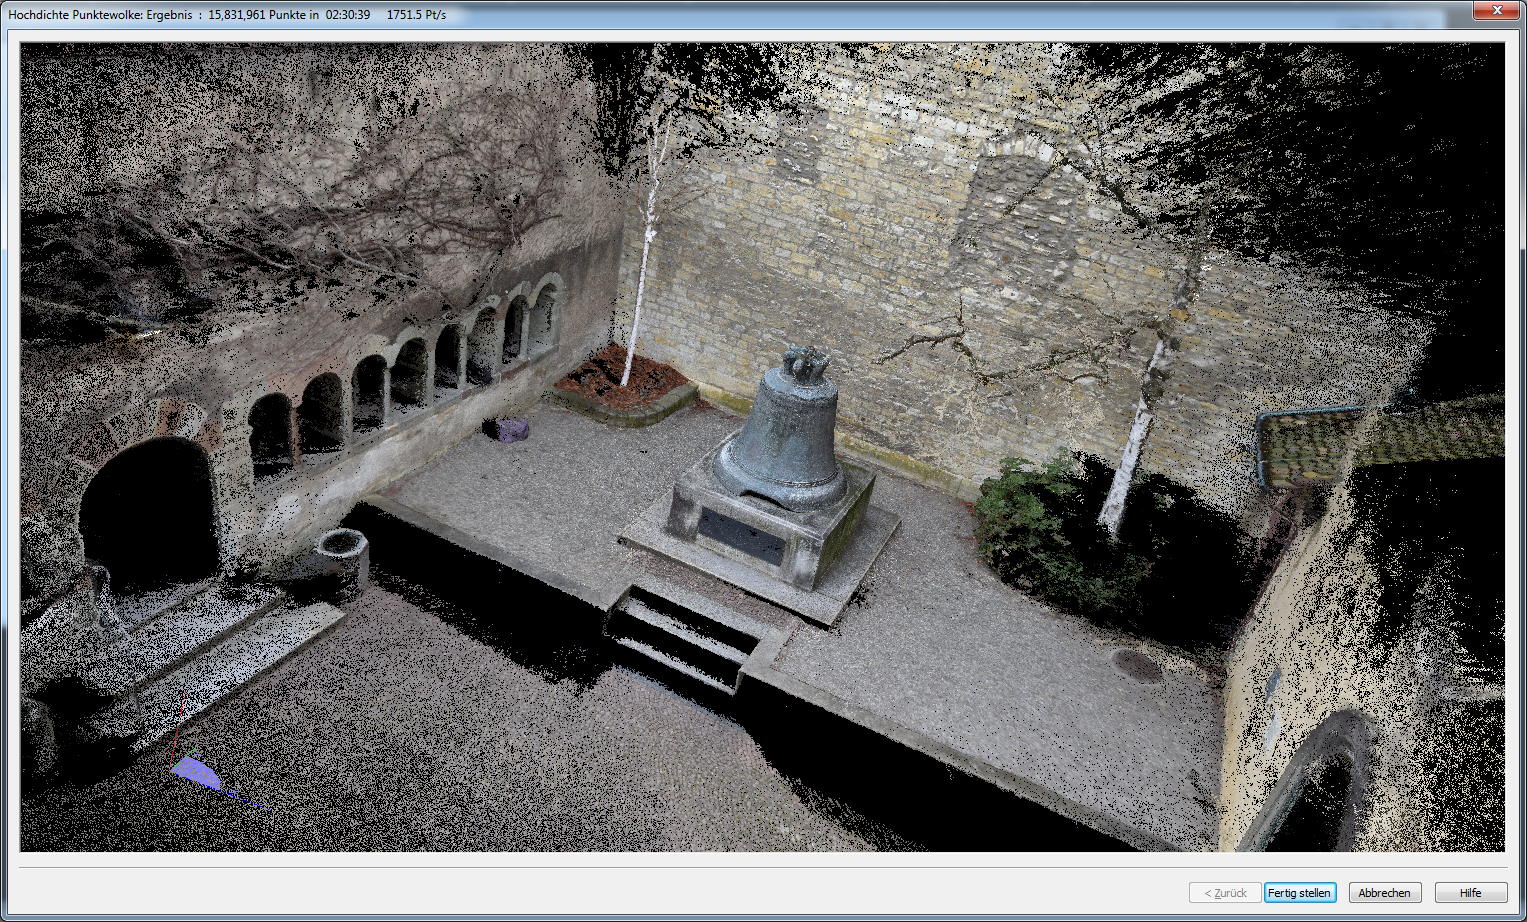
Then press Start!. After some time you will get the result:

Tips and Tricks
For the calculation of the high density point cloud, the project should be on a local hard disk, not on a network drive. If it is on an SSD, the calculation is up to 30% faster.
After the calculation it is recommended to delete the directory "Tmp_Projectname", since several GB of temporary data can accumulate there.